|
Easy Phone Provisioning
Posted by Iulian Lica on 20 March 2019 11:01 AM
|
|
|
Easy provisioning is a simpler way to program a phone unto a PBX. It works by attaching a MAC of a phone to an extension and thereafter pointing the phone to the PBX (some models not required).
Below is a simple step by step guide. Your interface may vary depending on the version, but the procedure remains the same.
1. First login into your PBX with the credentials you have. If you do not know them please contact your account representative.
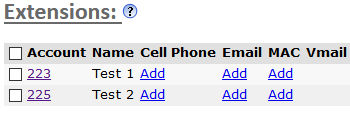
2. Filter the accounts by Extensions, this is commonly found on the left hand side of the interface.
3. Click on an extension you wish to attach a MAC to.
4. Go to the sub-tab "Registration" or "Provisioning".
5. Under the MAC field input the MAC of the phone. You do not need to use spaces or : NOTE: Each phone manufacturer has their own MAC range for their hardware, for example most Snom brand phones start at 0004, Grandstreams start with 000B...etc
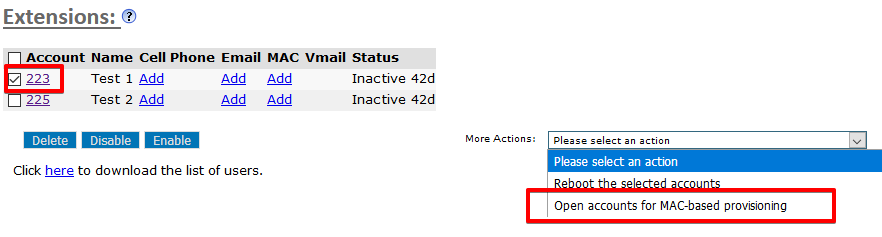
6. Go back to the main Extensions page.
7. Check the box for the extension you wish to enable the provisioning for.
8. Afterwards navigate to the bottom right hand side of the page and you should see text for "More Actions"
9. Select the drop down "Open Accounts for MAC based provisioning". It will give you a pop-up to confirm. Afterwards extension will be open for provisioning.
10. Reboot the phone, assuming the phone has been instructed to receive configuration from the PBX it will automatically program itself for the selected extension with no other input. NOTE: Some phone models allow for automatic provisioning, however this is an advanced feature and most commonly setup by your account representative for some applicable phone models.
If everything was done correctly the phone should program itself after a quick reboot and you will be ready to use the phone within minutes. | |
|
|